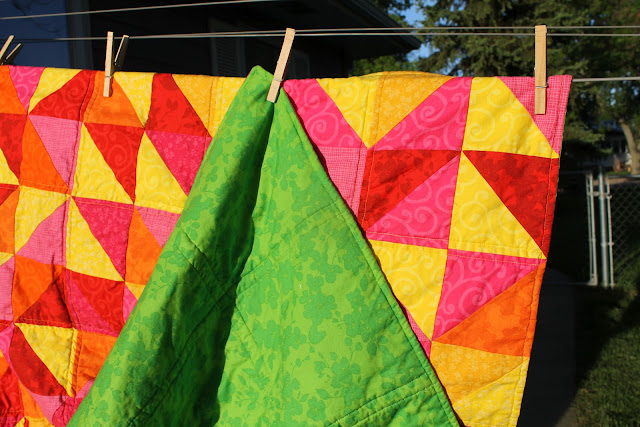
I had so much fun throwing this quilt together in just a few days. I love the bright colors (they really glow with the late afternoon sun, don't you think?) and it just made me happy working on it. I used this pattern and really enjoyed the randomness of putting it all together. I did make piles of squares for each row before I started sewing them together to make sure that the colors would be balanced overall, but I didn't plan out the order of each row or how I put the rows together. It was fun to see it come together as I sewed! Here is how the work broke down:
Day 1 (evening only): ironed 10 fat quarters for the front, cut them into 5" squares (12 from each FQ), drew diagonal line with pencil on the backs of half of the squares.
Day 2: paired squares, sewed down both sides of each diagonal line, cut each in half, trimmed corners, made piles for each row, sewed 10 rows of 12 squares. (Note: Timothy had a 3 hour nap and Jared had evening classes at church, so I had lots of time!)
Day 3: sewed all rows together to make top, made quilt sandwich, sewed sandwich, flipped quilt inside out (I didn't use binding), sewed around the edge.
Day 4: quilt, wash, dry, and admire. Oh, and somehow break my walking foot...hoping I can fix it, or I need to invest in another one....sigh.
Dimensions: 40 inches x 48 inches
Total Cost: (so I remember and in case you were interested) $42.79
10 Fat quarters at $2.60 each and 20% off - $20.80
1 1/2 yards Backing material at $10.69/yd and 10% off - $13.90
Baby Quilt Warm and Natural Batting at $8.99 and 10% off - $8.09
the back is lime green :)


that is so rad. will you make me one? ;)
ReplyDeleteYou are amazing!
ReplyDeleteGina, as long as you are prepared to wear sunglasses whenever you use it. :)
ReplyDeleteHey there, You have done a fantastic job. Thanks for sharing such a nice information, The thing is that going perfectly here. That's truly good, keep up writing...You get more succeed.
ReplyDeleteBest panini press
commercial panini press